~Hand Pavise~
August of 2008
|
|
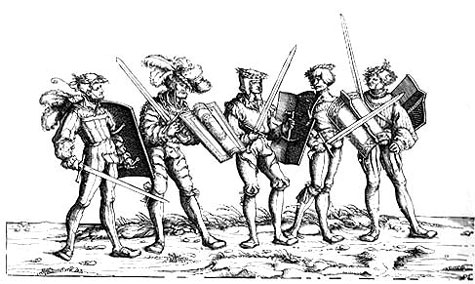
Woodcut from "The Triumphs of Maximilian"
(1512-1526, cut under the supervision of
Albrecht Durer). There is a very good
discussion on full size and these smaller
hand pavises at MyArmoury.com -
here is a link to it.
|
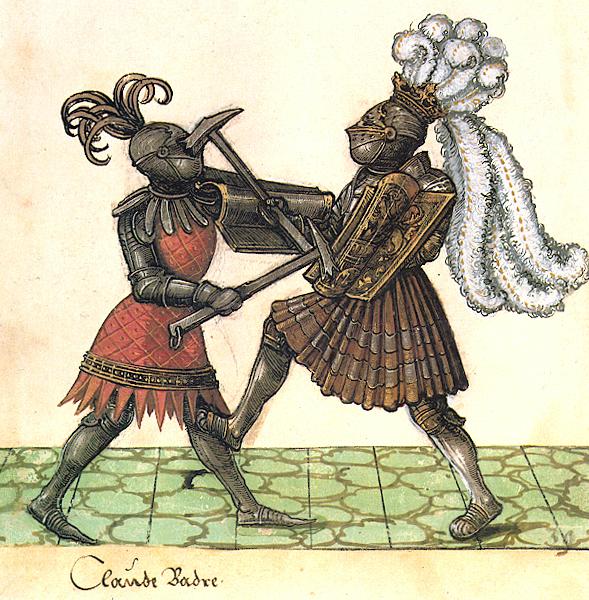
Image from 'Freydal', Maximilian's
(never actually finished) book of
tournaments. I have not been able
to find a date for this, but going
by the dates of Maximilians other
literary works, I would guess it is
from around 1516, +/- a couple years).
|


|
|
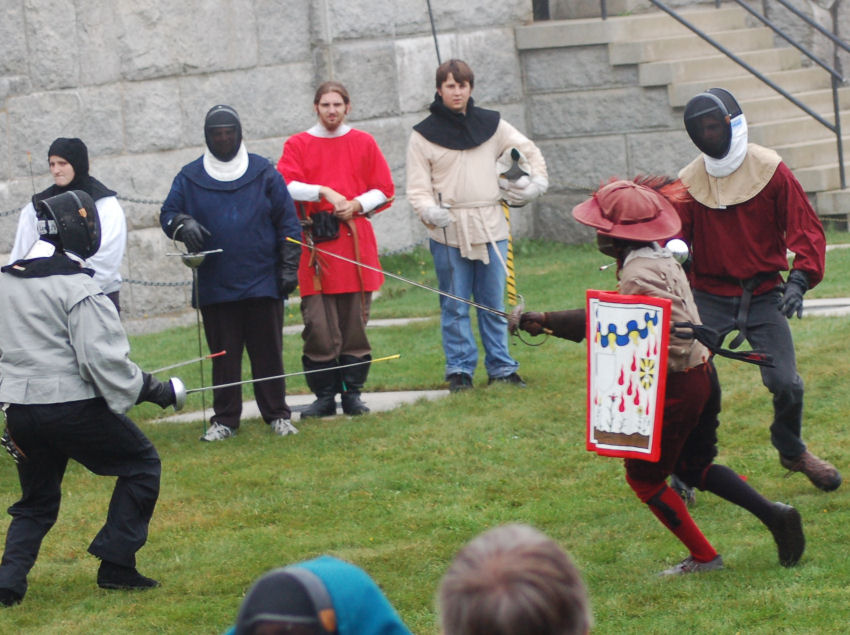
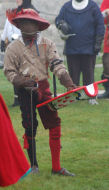
My first prototype hand pavise being used for SCA 'rapier' combat.
|
Construction details
One thing I found out soon after thinking about making one of these is that there is not a whole lot of information on the construction of of them in period, and even less information to be found online about modern recreations of this type of shield - so I made a point while working on this to try to remember to get out the camera once in a while. The gutter shaped area down the center was most puzzling to figure our how to build. I thought about various methods and materials - hardened leather, steamed plywood, hollowed out log/branch, metal... in the end I decided on a base of wooden strips nailed to steel bands. For several reasons (having never made one before, obscure details of construction, lack of time and money, and the fact that this thing would likely get the snot beat out of it SCA combat) I decided not to build this as a historical reproduction, but instead as something that could be passable as a reproduction on the outside, be about the right weight, and maybe hold up to use in both SCA heavy list and fencing - an using mostly materials that are somewhat similar to what would have been available in period.
Period examples of these (which have been examined and I am aware of) are made with a core of willow; to which a layer (or layers) of canvas, rawhide, or leather is glued. The backs are often covered with parchment. The whole thing would then be painted with gesso, then painted with tempera or oils, or in some cases silver leaf over-painted with black and white to somewhat resemble a three-tone woodcut. Pavises covered in leather or rawhide were often very elaborately tooled.
|
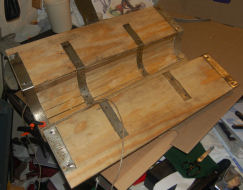 |
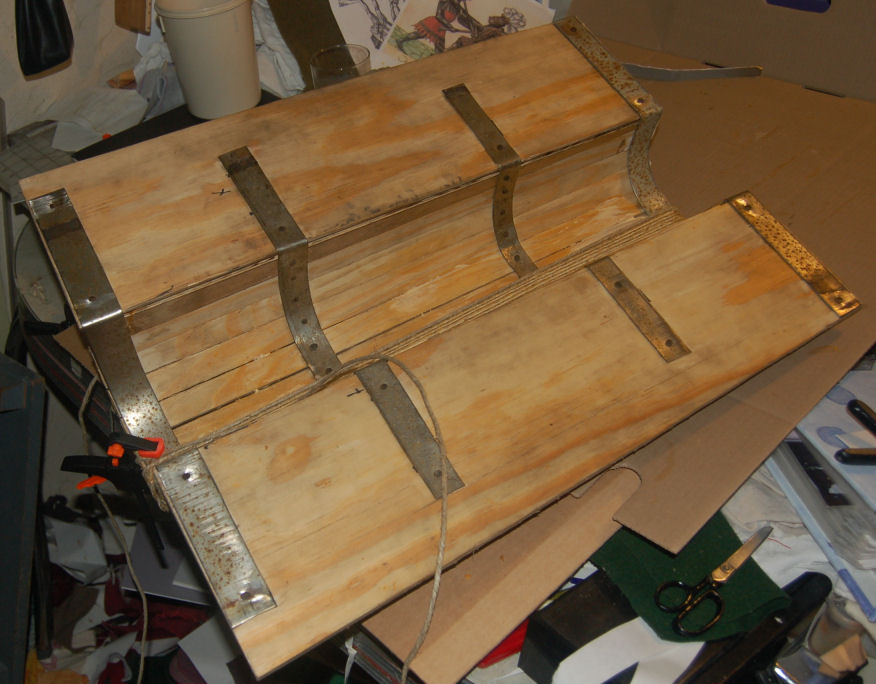
This shows my wooden core made up of 3/8" birch plywood for the wings and strips of 1/4" birch plywood for the gutter. I used four bands of 18 gauge steel to hold it together on the backside. Because of steps later in the construction, the strips are only nailed (with 1/2" cut tacks through pre-drilled holes in the steel bands) to the center two steel strips. I started by cutting out the wings and steel bands, then shaped the bands and nailed them to the wings. That gave me a framework for the gutter. I then cut out the 1/4" thick strips and nailed them in place. All of that was already finished when I took this photo, and I had already begun my next step... |
 |
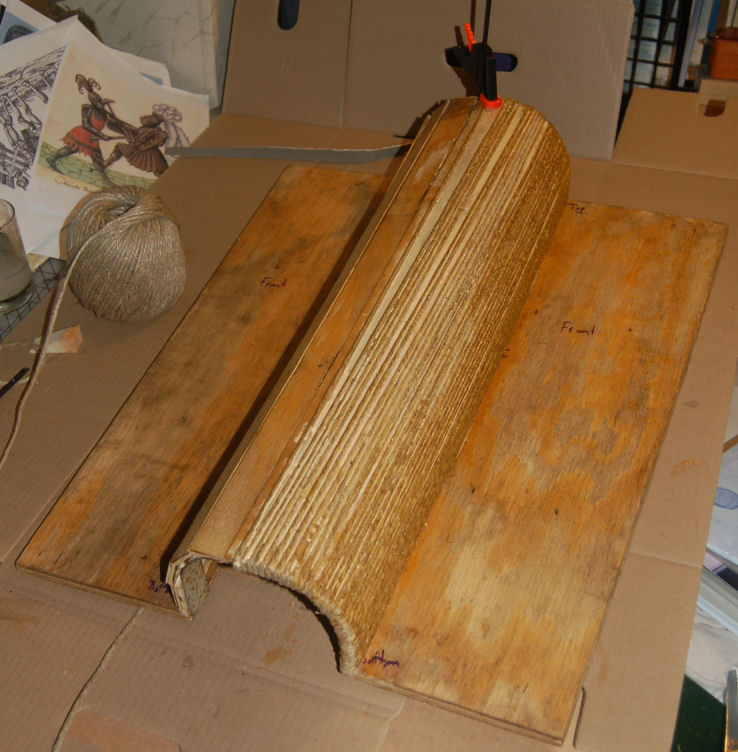
...the next step in my plan (after painting over all of the wood with thinned out wood glue and letting it soak in and dry so later layers of glue would not just soak into the wood) was to wrap the whole gutter very tightly in hemp cord that had been soaked in glue. This was a very messy process. My idea with the hemp cord was that hemp is a very strong (and period) fiber which stretches/expands when wet... so I soaked it in glue and wrapped it as tightly around the gutter as I could - as the glue dried the cord tightened up even more and held the parallel strands to each other as well as adhering them to the wooden surfaces. Because the top of the gutter has a slightly larger radius than the bottom there were some gaps left between the cords. I soaked more cord with glue and stretched those around from back to front to fill in the gaps. |
 |
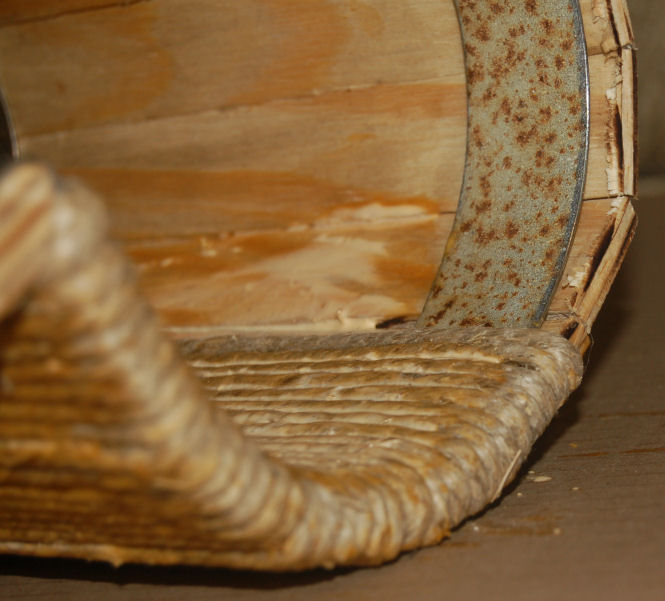
A closeup of one end of the gutter as it was being wrapped. The cord holds the loose ends of the strips very tightly to the steel bands at the ends of the gutter. I wish that I would have remembered to get a picture of what went on between when this photo was taken and the next one. I cut out a bunch of 1/2" wide steel bands to add structural support to the front of the pavise. These bands go around the front edges, down the front-center of the gutter, and one from top to bottom of the wings right next to the gutter. Aside from making the whole thing more stable, the vertical bands around the front of the gutter are also functioning as a solid backing for nailing the handle on to. At this point (with the reinforcing strips around the front edges of the pavise) I nailed through the top and bottom edges of the gutter, tightly sandwiching the hemp-glue-wood-glue-hemp layers between the bands on steel on the front and back edges. |
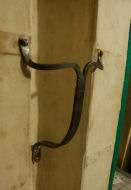 |
I then glued canvas to the back, and forged out the handle. Unfortunately one arm of the handle snapped off after I split it into the Y shape and started bending the arms out - unfortunate because I was trying to finish this thing to use at an SCA demo in a couple days and I did not have time to start over, so I welded it back on... fine I guess - the handle would later be wrapped in leather so the weld is covered anyways. The canvas on the back wraps around over the front edges to about one inch. The handle is nailed on with some old cut nails which I think came out of part of my family's house when the back half was torn down and rebuilt a couple decades ago... the arms of the handle are nailed on from the back, with the extra length going through a steel strip on the front and hammered down flat into the strip. The two nails at the bottom of the handle are were trimmed short and used more like rivets, going through the strip that runs down the center of the gutter and peened over on the handle. |
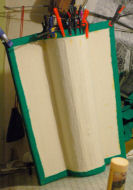 |
Next step was to canvas the front. For added strength I used two layers of canvas on the front... it works like a primitive fiberglass when soaked in glue. This photo was taken after the first layer of canvas was glued to the front, and I wanted the edge to be a bit softer than it would be with only the next layer of canvas. I took a look at what I had that would work and found some bright green wool that I was not very likely to ever use for anything that would be seen... and the wife felt the same way about it... perfect! I cut some strips from that to wrap around the edges... glued and clamped it into place, and while that was drying was when this picture was taken. There was one more layer of canvas to go on the front, then the whole thing was painted with a couple coats of acrylic gesso (hide glue gesso is what would have been used, but this project isn't quite that fancy - which is half the reason...), I then painted it with acrylic artists paints. I would have painted it with oils, which I had on hand, but it was past midnight and I planned on using the pavise in about ten hours - and oils would take at least a couple days to dry. |
I plan on giving it an overcoat with oils, which should give it less of a plastic look, and I still have to figure out and paint on my SCA arms into the small blank shield-shape on the center of the gutter. The overall motif of a cloud with sun rays or lightning, flowers, and red droplets is based on a couple of larger Bohemian pavises, and I think relates to a 'bloodied ground - fertile soil' motif, which seems appropriate for a mercenary. The wings of my pavise are painted with the white tower on a black and yellow field - for my local SCA group, the Shire of Endewearde; and on the other wing is a red scorpion on a black field - the badge of the Crimson Scorpion, my SCA household and group that I fence with.