Spring, 2007
3 block Chiaroscuro Woodcut, ? x ?"
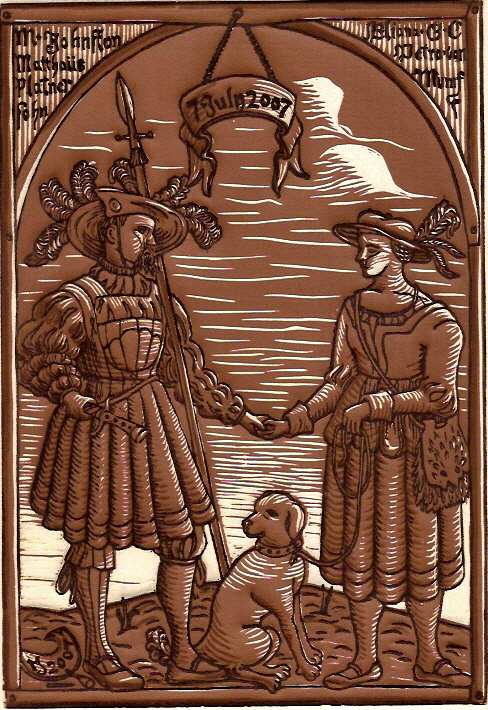
This woodcut was made to print invitations. It was printed from three woodcut printing blocks, in a style of print called a chiaroscuro woodcut. This type of woodcut enjoyed a brief bit of popularity during the early 1500's as printmakers Hans Burgkmair and Lucas Cranach the Elder competed for the delight of Emperor Maximilian to create woodcuts which would imitate the effect of chiaroscuro drawings which were popular at the time.
These woodcuts would typically be printed from three blocks - The first block lays down a broad swath of mid-tone, and any part of the print which should be printed as white, such as highlights, are carved out of the block so they do not print. The second block is a darker layer which helps to define shadows. The third block to be printed is most like a regular woodcut and is sometimes called the key block. With black lines delineating shapes and most of the shadows it sort of ties the other layers together into a finished image. There are several variations of chiaroscuro woodcut, some with highlights made by brushing sticky gum arabic onto the print and flocking it with gold or silver dust, some were made so the key plate can work on it's own as a print, and some where all plates must be used to finish the image.
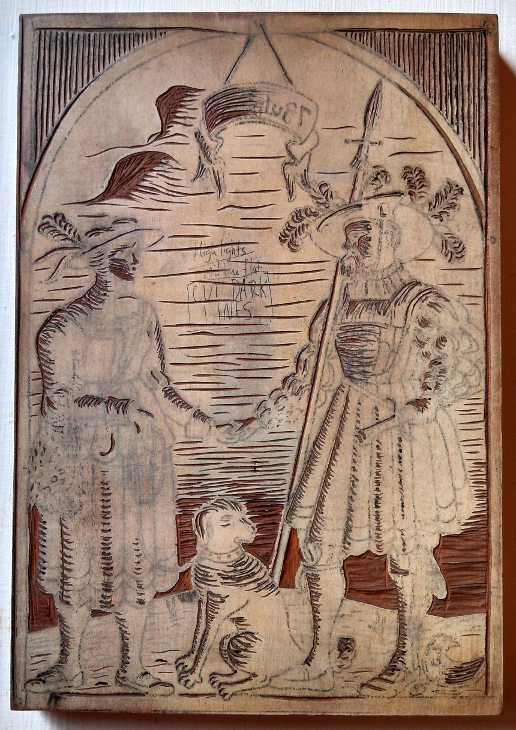
Pictures of the woodcut printing blocks are below. These were hand carved from one inch thick cherry wood planks. They were prepared for carving by first planing them so all three were exactly the same thickness; they were then sanded smooth and painted with gesso, then sanded smooth again. I used winter green oil to transfer photocopies of my original drawing to the prepared blocks and used the transfered drawings as a guide for carving. As is shown further below, rubbings were done on the blocks while carving to get an idea how my printed image might look. Once the carving was finished I coated the carved surface with thinned polyurethane to keep the blocks from soaking up printing ink later on, which would make them easier to clean. From left to right are the Key or line block, the secondary shadows block, and the midtown/highlight block.


I wanted the key plate for this print to be able to be printed on it's own, which would leave me with the possibility to hand color some of the prints with watercolor paints. Because of academic time restraints I did not have as much time to finish the highlight/midtone plate as much as I would have liked to... The sky and background has always bothered me a bit, seeming not quite finished to my eye.
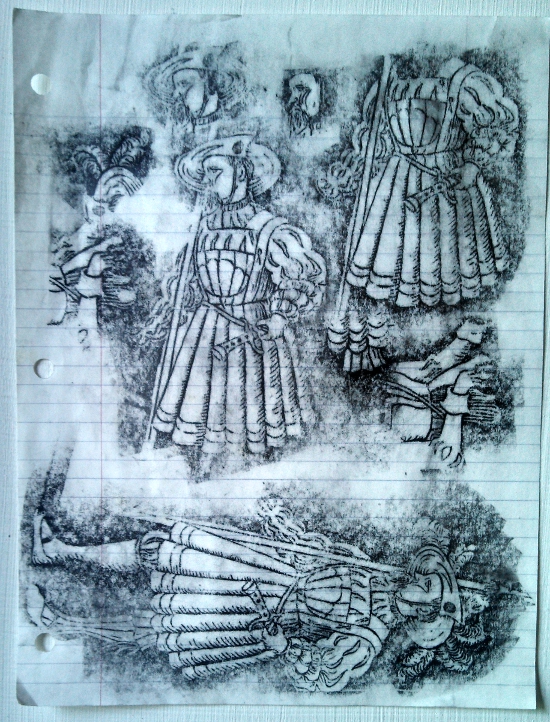
An easy way to get an idea of what an in progress woodcut would look like at any given state is to make use thin paper and a crayon or charcoal to make a rubbing. Here is one of the papers I used to see how my key block was coming along.