this journal thing will also have a couple new pictures with each update...
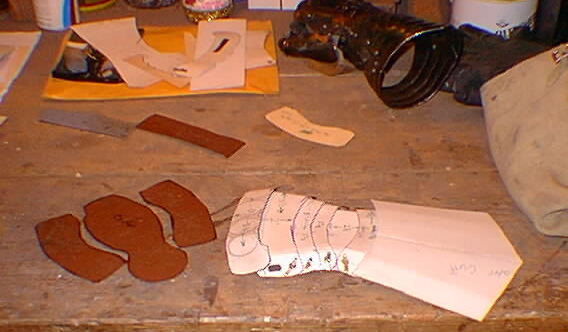
Picture of the center three lames cut out and the cardboard pattern.
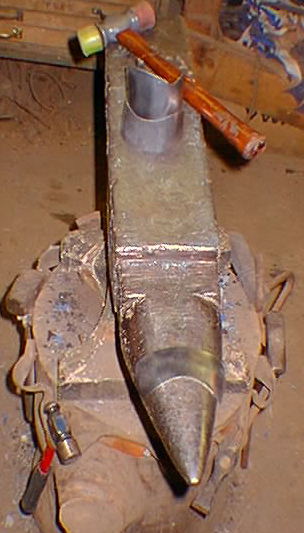
Picture taken while I was shaping the above three lames on the anvil and after I took the paint off.
Picture
of the cuff after drawing in the area that needs to be removed. I have
a template use to get it the same on each lame but I forgot to put it
in the picture... I'll put it in the next update to this page.
Picture
of the finnished edge after using a belt sander and files to remove
the part marked in the picture above. These are also good pictures
of what the cuff looks like before I add the fluting, piercings, rolled edge,
and blue.
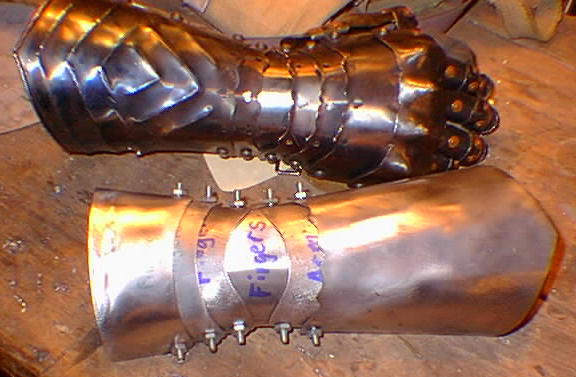
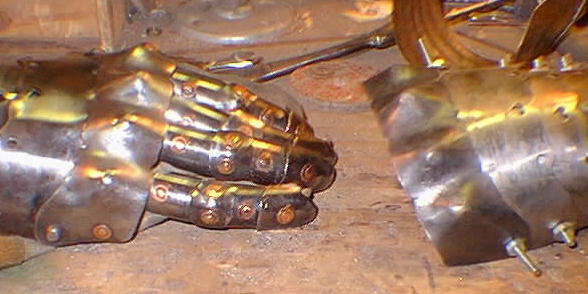
Picture of the work in progress next to the finnished gauntlet. This was taken after the rivit holes were made but before the decorative edging was put on all the plates. These parts will not actualy be rivited together until all the other gauntlet parts are complete so I can blue all the parts just before I rivet it all together.
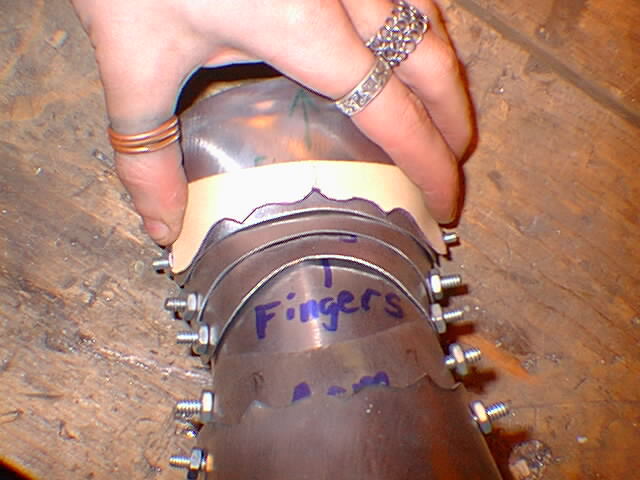
Picture
of the template used to trace out the decorative edge lined up on the
edge I'm about to mark...
Picture
of the central wrist plate with holes punched to make a slot. the
two outer holes, one on each side, are the original holes. The other
two were punched as far in as I thought it would be able to articulate.
The next step is to use a round file and turn the space between each set
of holes into a slot. Another hole can be punched to make for less filing.
Picture
... this is a very cheasy picture showing how I make the heart shaped
holes. I had actual photos but they did not come out to good. So here's
the deal... first draw out where the heart shape should be. Then punch
out the two rounded parts at the top of the heart, in the picture these
are dark red. Next use a small flat file and a small triangular file
to remove the rest of the heart which is shown in red.
Picture
of my imitation whitney hand punch. This is what I've been using to
make holes when I do not want to use a drill press. It can, if you put
alot of effort into it, punch through 12 gauge mild steel.
It works great for 16, 18, and 20 gauge mild steel. It also comes with
punches and dies that range in size from 1/16" to 9/32".
Picture
of the left handed gauntlet after another night of work. Despite the
reflection of the flash :( it does well at showing how the decorative
edge and the piercings make it look alot better than the plain edge
shown in the last post to this page...
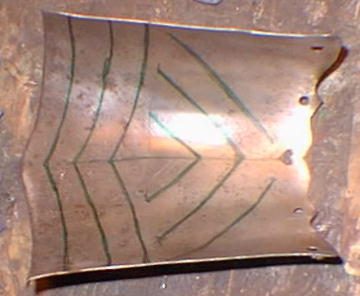
Picture
of lines drawn onto the inside of the cuff to show where I'm going to be pounding.
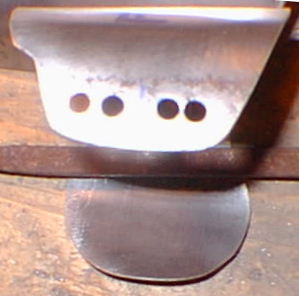
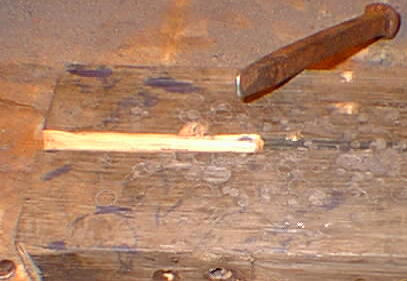
Picture
of the block of wood with a 'V' shaped groove cut in it and the
small chisel with rounded corners and edges.
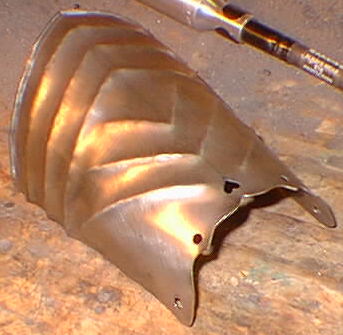
Picture
of the outer half of the cuff with the fluting done. I still need to
smooth up the lines a little cause they are a little bumpy in places.
Well, it turns out the left and right knuckle plates were almost exactly the same size so I don't need to do another one... yet. I finished shaping the left knuckle plate and drilled the two holes for it to articulate to the other lames of the gauntlet.
Picture of the unfinished left handed gauntlet next to the finished right handed one.
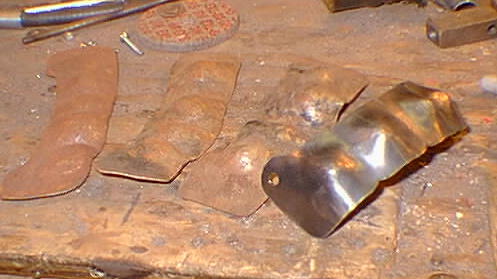
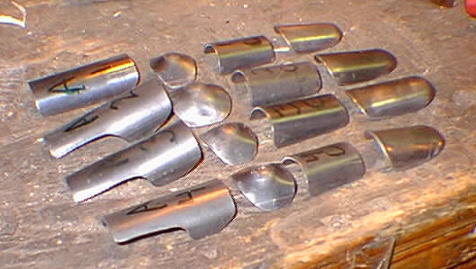
Picture of the left handed knuckle plate, shaped and drilled with two holes for articulation to the metacarpus lames. To it's left are several practice peices done before I did the knuckle plate for the right handed gauntlet.
Picture
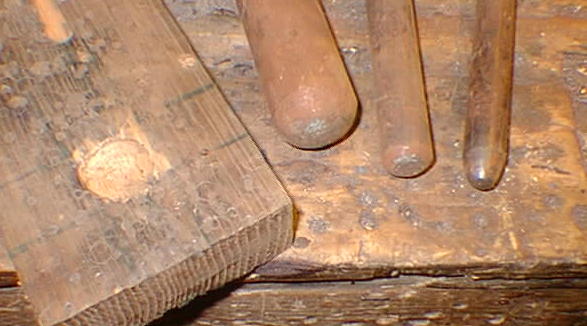
of my knuckle dishing tools. Pretty simple stuff, just a block of wood
with a one inch diameter hole drilled in it and three different size
sections of barstock with one end rounded down. I start by placing
the peice of metal I want to dish over the hole in the wood. Then I take
the largest of my dishing tools, place it over the metal above the hole
and give a couple whacks with a hammer. This pushes the metal between the
dishing tool and the hole into the hole creating a rounded bump on the
other side of the metal. I do the same thing for each knuckle then move
onto doing the same thing to each knuckle with the next smallest dishing
tool. Then I have the basic shape of the knuckle roughed out.
Now, here are a couple pictures that sort of show how I give the knuckles
more deffinition and shape...
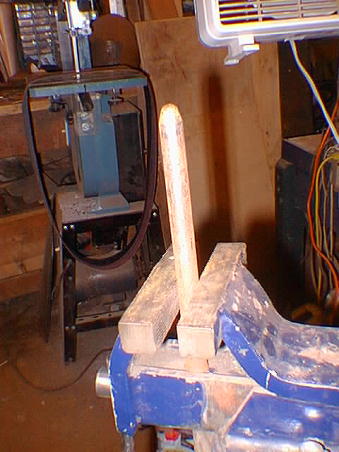
Picture of my smallest knuckle dishing tool stuck in a vice. The next picture shows why...
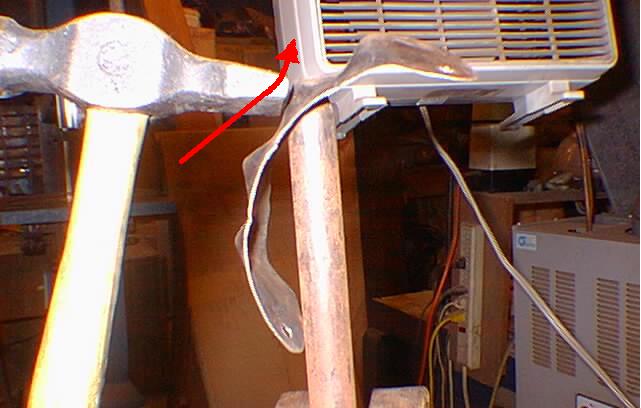
Picture
That tries to show how I raise the dished knuckles into points. What I
try to do is to work around the knuckle using sort of an upward glancing
blow from the hammer to push metal from the bottom area of the
knuckle up to the top and carefully form it into a point. The red
arrow in this picture shows the direction of my hammer blows
Tonight I worked on the fingers. I cut out all the 16 metal parts and shaped them. A couple things to think about when doing the fingers... The tops of the fingers lengthen when the fingers are bent and fingers have to be bent to hold a sword, so the plates should be made with measurements taken from the hand while it is holding something like a sword hilt. If the measurments were taken from straitened fingers then the gauntlets fingers might turn out to be too short.
and also remember that the fingers on this pair of gauntlet are articulated to a leather strip running down the length of the finger. The leather strip will also increase the length of the finger so I made sure to measure my fingers with the strip of leather in place.
Here are some pictures showing what I use to shape the finger plates:
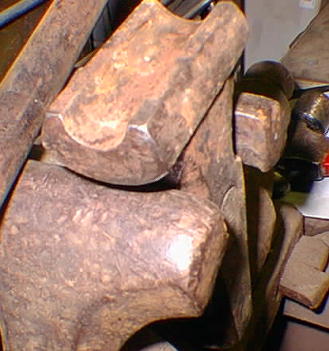
Step One: This picture shows a hammer stuck in vise, and my part of the medium-sized knuckle dishing tool... But its not just any hammer. Its a special hammer. I'm not certain what purpose it was meant for but the semi-circular groove down the center of the hammer face is just the right size to fit the top half of a finger. And it also just so happens that the side of my medium sized knuckle dishing tool is just the right size to fit into said groove.
Step Two: This one is a picture of one of the finger plates positioned on the groove in the hammer face. The side of the knuckle dishing tool is placed over the finger plate and the groove. A few hits on the knuckle dishing tool will push the finger plate into the groove.
Step Three: The finger plate is now curved...
Picture
of tonights progress. The four knuckle plates for the fingers (and two
for the thumb later on) are all shaped in a similar way to the main
knuckle plate but not as much shaping is really needed.
Tonight I cut out and shaped the largest thumb plate and the thumb's knuckle plate. I cut out and -started- shaping the plates for the tip of the thumb. Didn't really get much done cause I spent a lot of time trying to find a tool I had been using ten minutes earlier. Master Gregory says that it happens to him sometimes too but says he can blame it on senility... I blame it on my pineal gland. The tool I was looking for had fallen behind the anvil and I found it half an hour later, after ten minutes of actually looking for it instead of milling around the shop wondering what I was missing. Later on in the night I got bored with thumbs and riveted three of the lames together... the center three. Oh yeah, guess I should mention that I've been using some red handled wiss snips to cut out the plates for the fingers and thumb. Just thought someone might want to know that...
Pictureof this week's progress on the thumb. You might
notice that there are no thumb pictures from prior weeks. That's
because this is the first night I worked on the thumb. I like having
thumbs.
Tonight I worked on the fingers some more. Punched some holes in them and articulated two of them on to the leather strips. Did not get as much done during the summer as I had hoped to. oh well.. it'll get done eventualy and I can move on to other projects. Yes, I am getting a little bored with this project...
I got quite a lot done tonight. All the finger finger parts are now articulated to leather strips and sewn to pieces of 16ga wire that is welded to the inside of the knuckles. I scrapped the enclosed thumb tip I was working on because it was to small and I realised that a fully enclosed thumb tip would not work well with the maille palm (don't know if it's a period thing to have on the palm of a gauntlet, I got the idea from a roleplaying game called Seventh Sea, but maille palms on leather gloves were period and this way I won't have to choose between good hand protection and a glove I can grab blades with...pluss I think it'll look really cool :) ) that I am going to put on the gauntlet when it is done. On the right handed gauntlet, the hinge connecting the thumb to rest of the gauntlet is a commercialy made hinge that I cut some parts off from to make it look like ones I had seen pictures of on period gauntlets. For the left handed gauntlet, I didn't have a chance to go out and find the same kind of hinge I had used before, so I made one. I cut a strip of 20 gauge steel and rolled the edge of it so a nail would fit inside. I cut the strip to the length I needed for one side of the hinge, then used part of what I had cut off as the other side and filed down the center of the first piece until the second piece would fit. The hinge I made is a lot stiffer than the commercially made one, but it does need to move much anyways and seems to work fine. I might leave off the inner cuff I made for this gauntlet and just go with a leather strap and buckle to fasten it accross the forearm. The inner cuff on the right handed gauntlet pops open sometimes when it takes a hit, so I figure that one less inner cuff will be one less piece of armor that might open up while I'm using it... and I've seen plenty of pictures of period gauntlets of this style that do not have an inner cuff, just a strap and buckle. I also did the rest of the riveting for the rest of the gauntlet so pretty much all thats left is to put a glove in it and sew on the maille palm. I hope to have it done after another night of work.. No pictures of tonights progress, but it looks pretty much like the right handed gauntlet without a glove, inner cuff, or fully enclosed thumb plate. One thing I should get pictures of is how the fingers are sewn to the inside of the knuckle plate.